A Step-by-Step Guide to Reinstalling Your Operating System
Reinstalling the operating system on your computer can often resolve a variety of issues, especially when you’re facing software problems or system slowdowns. Whether you’re upgrading your current OS or fixing a malfunctioning one, reinstalling can give your computer a fresh start. In this guide, we’ll walk you through the process of reinstalling your operating system, ensuring a smooth and effective installation.
1. Backup Your Files
Before you start the reinstallation process, it’s crucial to back up all your important files. Reinstalling the operating system will erase all data on your computer, including documents, images, software, and system settings. To avoid losing anything valuable, make sure you:
-
Backup personal data: Save your files, folders, photos, and documents to an external hard drive, cloud storage, or a USB drive.
-
Backup installed programs: Some applications can be synced to cloud services, like Google Chrome, which can back up your browser history, bookmarks, and settings. If you play games, use services like Steam Cloud to sync your game saves. If needed, make a list of the programs you’ve installed, so you can easily reinstall them later.
2. Make Sure You Have Your Product Key
To reinstall your operating system, you’ll need the product key to activate Windows. Here’s where you can find it:
-
In the software: During installation, Windows stores the product key in the system registry, and you can retrieve it during the reinstallation process.
-
On a sticker: For older versions like Windows 7, the product key is often printed on a sticker on your computer’s casing.
-
In UEFI/BIOS: For newer Windows versions (Windows 8 and 10), the product key is stored in your computer’s UEFI firmware. The OS will automatically detect and install the correct version without needing to manually enter the key.
3. Download Necessary Drivers
Before reinstalling, make sure to download the drivers for your hardware components, especially if you’re using an older version of Windows like Windows 7. Windows 10 and 8 are equipped with more built-in drivers, which means they will likely detect and install most drivers automatically. However, if you’re reinstalling without an internet connection, it’s best to download the necessary drivers beforehand on another computer and transfer them via USB.
4. Start the Reinstallation Process
Once you’ve backed up all your files and collected your product key, you’re ready to begin reinstalling the operating system.
-
Shut down your computer: Turn it off completely before proceeding.
-
Insert installation media: For Windows 7 or if you’re installing a different version of Windows, insert a USB drive or DVD containing the installation files.
-
Restart your computer: Turn the computer back on, and press the appropriate key (like F12 or Esc) to access the boot menu. You’ll typically see an on-screen prompt telling you which key to press.
-
Enter BIOS settings: In the boot menu, navigate to the “Boot Sequence” or “First Boot Device” section, and select the USB drive or CD/DVD drive as the first option.
-
Save and Exit: Once selected, press Esc and save the changes to boot from the installation media.
5. Reformat Your Hard Drive (Optional)
For a clean install, you’ll need to reformat your hard drive. This step is optional but recommended if you want to start fresh.
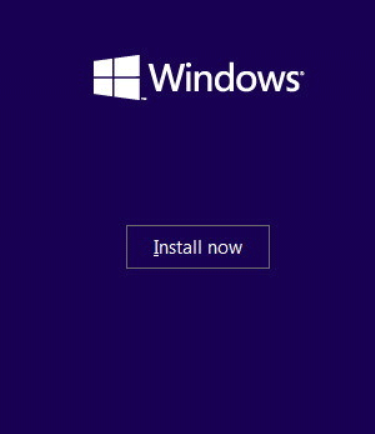
-
Choose Install Now: After booting from the installation media, click on “Install Now.”
-
Agree to Terms: Accept the licensing terms and click “Next.”
-
Custom Installation: Choose the “Custom (advanced)” option to perform a clean installation.
-
Select a Partition: Choose the largest partition (or the one where Windows was previously installed) and select “Next.”
-
Reformat: If you want to completely wipe the drive and start fresh, click on “Format” in the options for that partition. Confirm the action and continue.
6. Install Windows
Now, it’s time to install the operating system:
-
Enter Product Key: When prompted, enter your 25-character product key. If the key is stored in your BIOS, this may be done automatically.
-
Follow the Prompts: Continue with the installation by following the on-screen instructions. Your computer will reboot multiple times during this process.
7. Complete the Setup
After installation is complete, you’ll need to set up your system:
-
Create a User Account: Set up a user account and password.
-
Choose Privacy Settings: Choose your privacy preferences, such as enabling location services and allowing apps to access your data.
-
Install Updates: Once you’ve set up Windows, check for updates and install them. This will ensure your system is up to date with the latest security patches.
8. Reinstall Software and Restore Files
After the OS is installed, reinstall all your programs and restore your files from the backup you created earlier. This will help you get your computer back to its previous state with all your data and settings intact.
Conclusion
Reinstalling your operating system is a straightforward process that can help resolve various software issues and give your computer a fresh start. Just make sure to back up your data, download necessary drivers, and have your product key ready before you begin. With these steps, you should be able to reinstall your OS without any problems. If you encounter any issues during installation, consult online resources or consider seeking professional assistance.